
Running an EaglercraftX Minecraft server locally (and hopefully legally) on GNU+Linux
This guide will cover how to install and run an EaglercraftX 1.8 server and how to compile your own Eaglercraft build from your own copy of Minecraft so that when your friends and family who don't own a copy of Minecraft visit your home, you can use this approach to host a local server for them to play on.
This may also be useful for teachers who want to let all their students play on a local server hosted on the school LAN without the need to purchase a bunch of Minecraft licenses or Minecraft: Education Edition. This also has the advantage of being compatible with the Chrome
Section 1 - Building your own copy of EaglercraftX
Using Java 17
For the purposes of this guide, I will be doing this on Artix Linux (an Arch Linux-derived distribution), however, you adapt these instructions for use on other distributions as well.
To get started, you will want to be sure to have a copy of Java 17 installed. On Arch (and derivatives), you can do this by using the following:
java -version will tell you what version of Java you have installed. If that version is already of the 17 series, then you don't have to install Java, however, if you don't have Java 17 installed, then you will want to try the following commands:
# Install Java 17 (or re-install it if it's already installed)
sudo pacman -S jdk17-openjdk

# Set JAVA_HOME and PATH to use Java 17
export JAVA_HOME=/usr/lib/jvm/java-17-openjdk
export PATH=$JAVA_HOME/bin:$PATH
Now run java -version again. If it tells you that it's version 17, then you are good to continue to the next steps. Keep using this terminal window because this is where the Java path stuff is set.
Installing ffmpeg
You probably already have ffmpeg installed, but just in-case you don't, you will want to install it. On Arch Linux, you can do this:
sudo pacman -S ffmpegCloning and compiling the Eaglercraft source code
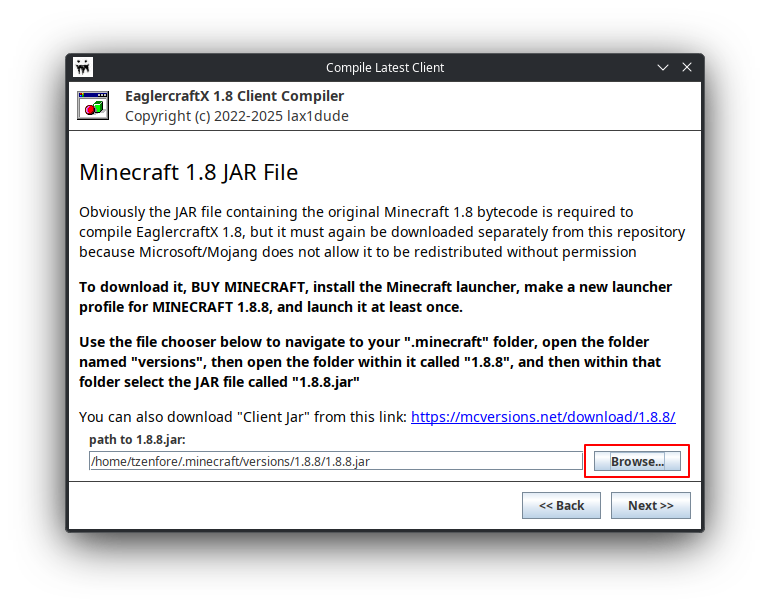
It is worth noting that a pre-requisite to this is having played Minecraft: Java Edition version 1.8.8 at least once in order to have the jar file downloaded as well as the json file that defines the resources used by Minecraft. The easiest here will probably be to just use the official launcher and create an instance of 1.8.8 and play it once if you haven't done so already. The official launcher can be installed from the AUR or downloaded as a tarball directly from minecraft.net.
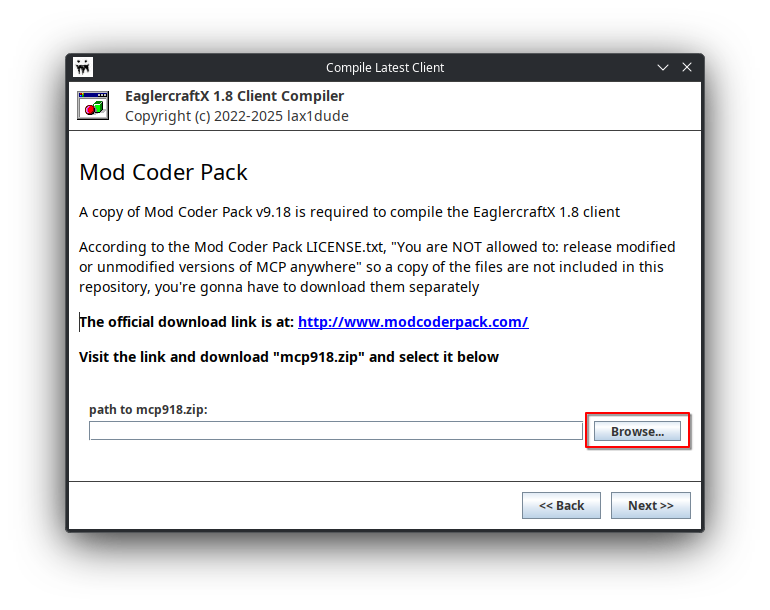
Once you have done that, you will want to download the Mod Coder Pack for Minecraft 1.8.8. This can be found here: mcp918.zip from modcoderpack.com
Now clone the source code for EaglercraftX using the git command, then cd into the new directory (Install git if you haven't already before doing this, of course)
git clone https://github.com/Eaglercraft-Archive/Eaglercraftx-1.8.8-src EaglercraftX-1.8.8 && \
cd EaglercraftX-1.8.8
Now use the run_chmod.sh script to make the necessary scripts executable:
bash run_chmod.shThen run this command:
./CompileLatestClient.shA window should pop up:
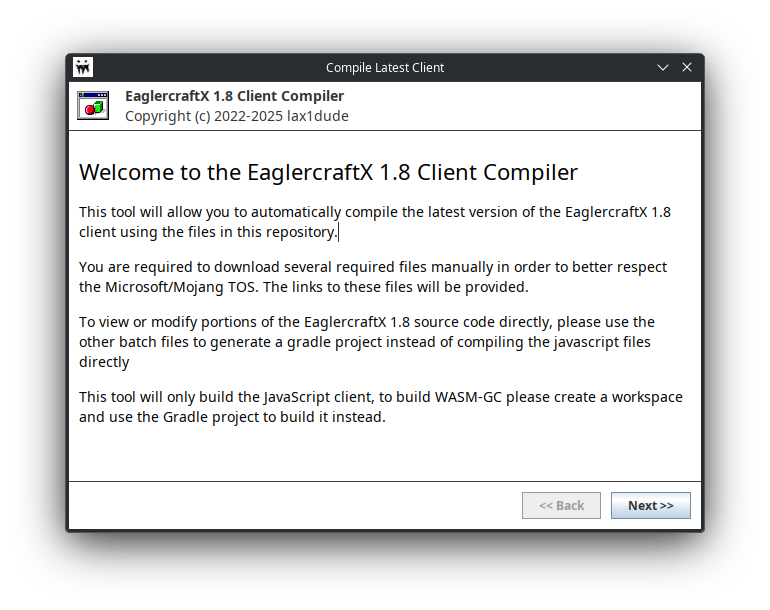
Then read the short license text then tick the agree box.

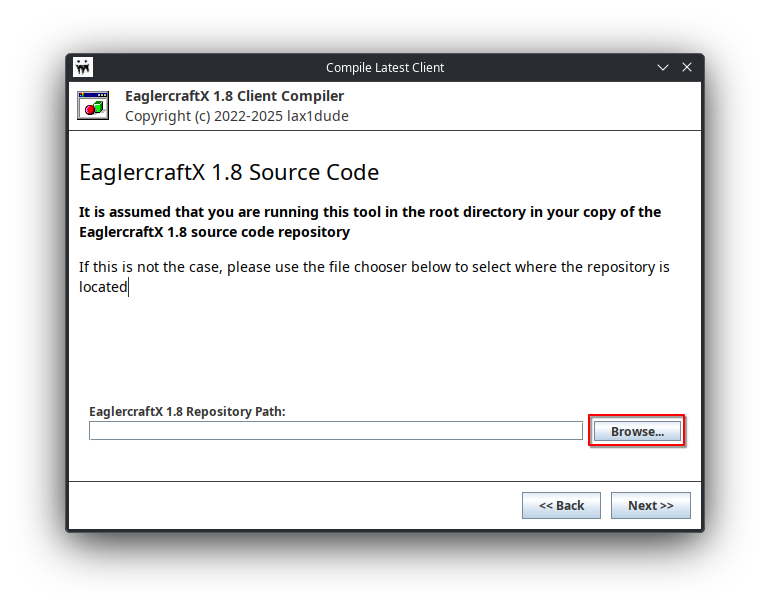
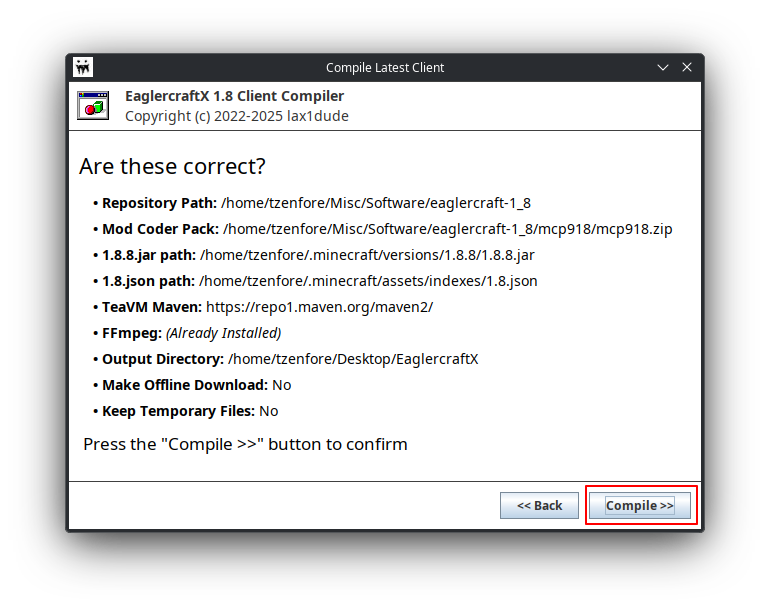
Now, on this next screen, make sure the repository path is pointing to the EaglercraftX-1.8.8 folder you cloned earlier.
On this next page, click Browse and find mcp918.zip
Now on this next page, click Browse and it should show your 1.8.8.jar file automatically. Double-click that file to select it, then move on to the next screen.
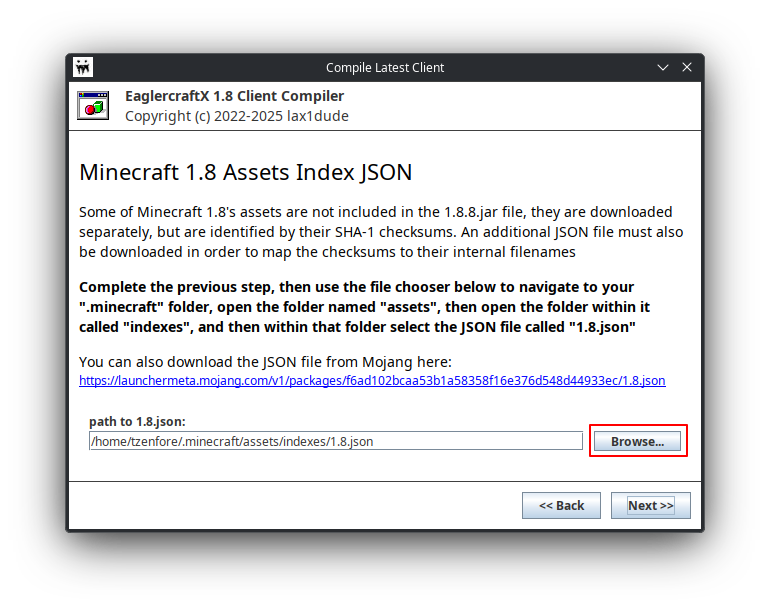
Now do the same, but with 1.8.json and move on to the next page.
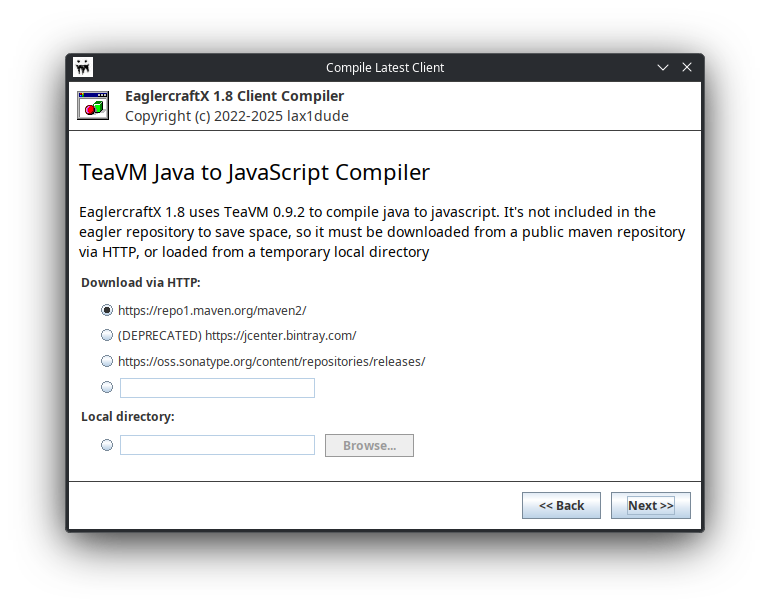
Click next and leave this screen at its default settings. We don't need to change the maven repo.
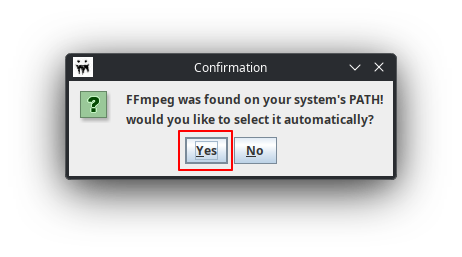
Click Yes on the box asking if you would like to select FFMPEG automatically.
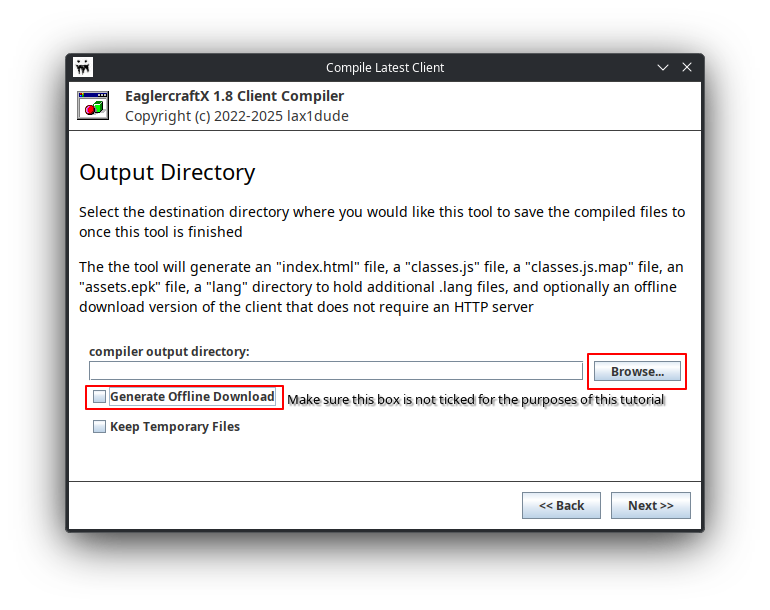
Now, on this next page, make sure Generate Offline Download is unticked since we don't need to generate an offline download for what we are doing. Also, make a new folder in a location of your choosing. I made a folder called EaglercraftX on my desktop and used that, but you can call it whatever you want as long as you know what it is. Click the Browse button and navigate to the new folder you just created and use that folder.
Now, click Compile >> and watch the Wizard do the rest for you.
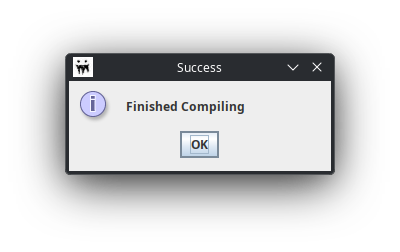
Once it's done, it will display this window. Click OK, then click Finish.
Section 2 - Setting up EaglerXServer
With your EaglercraftX build made using your own JAR file, you can now move on to the next step in this process; actually setting up the server that your friends, family, or students will connect join and play from their Chrome browsers.
First, you will want to clone a copy of the ready-made server setup that contains everything you will need to start a basic server:
git clone https://github.com/Eaglercraft-Templates/Eaglercraft-Server-Paper Eaglercraft-ServerNow, in your terminal, change to the Eaglercraft-Server directory like so:
cd <path to Eaglercraft-Server>then run chmod u+x run.sh && ./run.sh (after this, you won't need the chmod part of that command, this is only for the first-run)
Congratulations, your Minecraft server with Eaglercraft compatibility is now running.
Section 3 - Serving up your EaglercraftX Client
Now, you will want to download the EaglerWeb plugin from here: EaglerXServer Releases Page
Once you have it downloaded, put it in the plugins folder in your Eaglercraft server. If the server is running, stop the server, then restart it.
Now, move these files from your Eaglercraft build into the plugins/EaglerWeb/web folder of your server:
assets.epk
classes.js
classes.js.map
favicon.png
index.html
lang
Once you have done that, stop and start your server again.
Horray, you can now load up the Eaglercraft client by pointing any web browser to your computer over the local network at port 25565. You can test this by connecting to your own server at http://localhost:25565
Section 4 - Gettings others connected
The last step will be instructing the users of your client on how to connect to your server.
First, find the ip address of the computer you are hosting the server on (On linux, this can be done with the ifconfig or ip addr commands depending on the distro and if net-tools is installed), then instruct the users who are connecting to connect to http://<your computer's LAN IP here>:25565
Now, they should have the EaglercraftX client on their screens. They now need to add the server to their multiplayer screen.
Tell the users to go to Multiplayer, then click Add Server. Once they are on the Add Server page, tell them to use whatever name for the server they want, and to use ws://<your computer's LAN IP here>:25565 as the server address. They should now be able to join the server from the multiplayer page.
Have fun!